
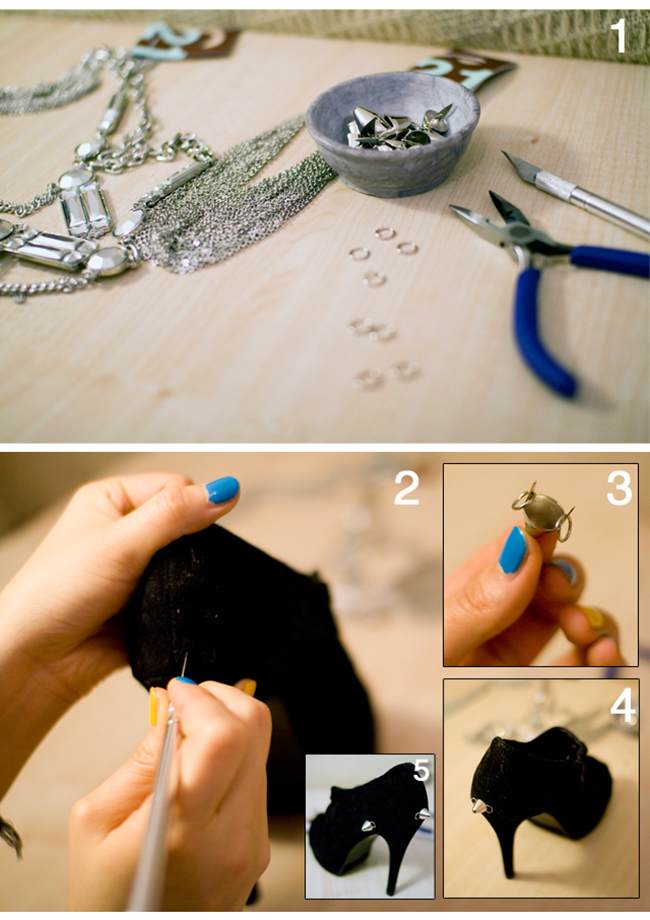
You will need:
1.a pair of open-toed booties or a pump, chains, piler, gripster knife, studs and jump rings.
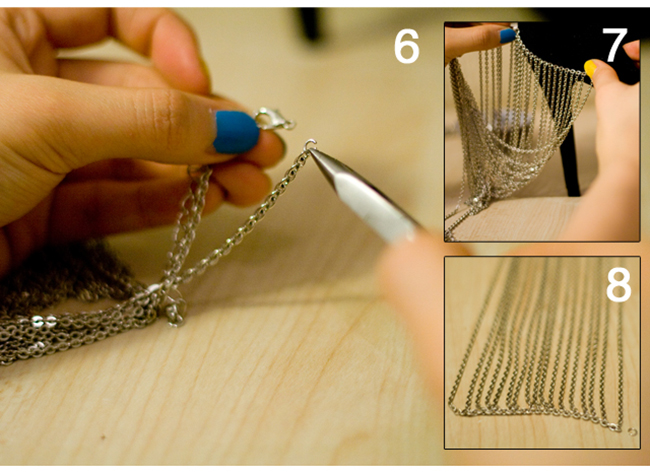
2. Make two small slits with a knife or blade around the center back section of the shoes, spaced equally apart to fit the width of your stud’s prongs.
3. Hang a jump ring on each of the studs.
4. then push the studs into the slits you made.
5. Repeat this twice, once each side of the heel.
1.a pair of open-toed booties or a pump, chains, piler, gripster knife, studs and jump rings.
2. Make two small slits with a knife or blade around the center back section of the shoes, spaced equally apart to fit the width of your stud’s prongs.
3. Hang a jump ring on each of the studs.
4. then push the studs into the slits you made.
5. Repeat this twice, once each side of the heel.
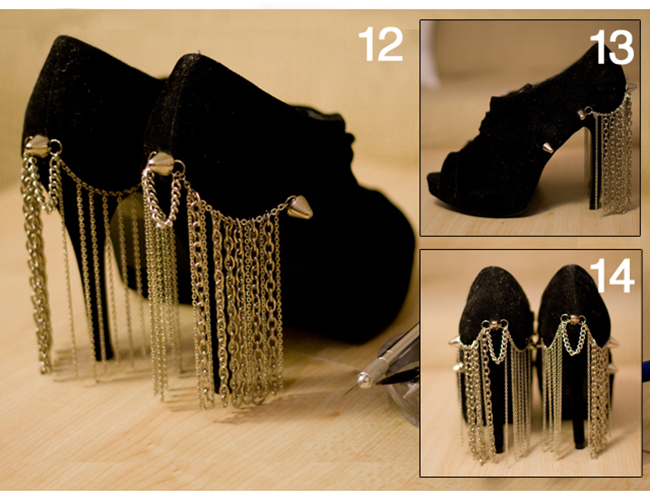
6. Take apart your draped chain necklace.
7. Measure chains onto shoes and cut at the correct width to hang it from one jump ring to the other.
8. Once cut, attach jump rings to each end.
7. Measure chains onto shoes and cut at the correct width to hang it from one jump ring to the other.
8. Once cut, attach jump rings to each end.

9. Attach jump rings and close with pliers.
10. Repeat with other end.
11. Cut the fringe just short of the ground with wire cutters.
10. Repeat with other end.
11. Cut the fringe just short of the ground with wire cutters.
12. Remove some fringe and add heavier-weight chains for more variety and added drama.
13. Add another stud a few more inches down the sides for another detail (note how fierce this looks from the back!).
14. Drape a heavier-weight chain from the jump rings on either side of the heel’s stud, for a polished effect on the back are OPTIONAL FINISHING TOUCHES.
13. Add another stud a few more inches down the sides for another detail (note how fierce this looks from the back!).
14. Drape a heavier-weight chain from the jump rings on either side of the heel’s stud, for a polished effect on the back are OPTIONAL FINISHING TOUCHES.
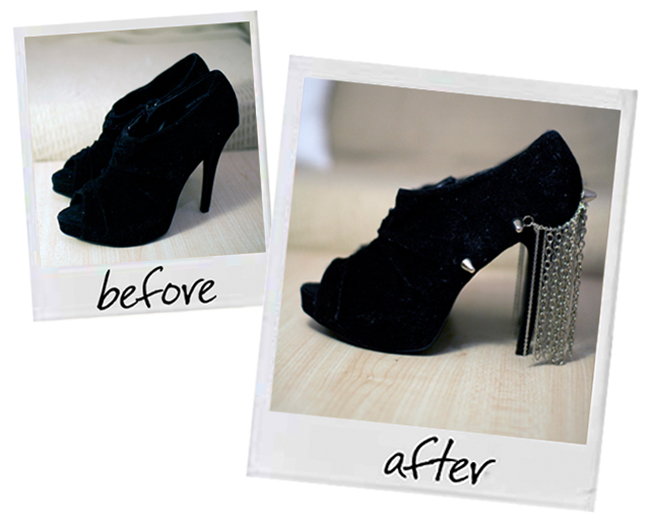
Finish!!!
Such a great idea for DIY!!!
Source: The Skinny


That looks HOT!!
ReplyDeletethese are fabulous.. definitely an AMAZING idea for a DIY!
ReplyDeletei always love your diy tutorials and ideas!! now im thinkin i could do a pair like these to make my outfit for my mom's wedding a bit more fashionable, since i have to use a very normal dress...
ReplyDeleteWhat a great idea! Thanks for sharing. :)
ReplyDeleteThanks for posting this up, if you could link back to the F21 The Skinny blogpost, or my own blog (http://www.parkandcube.com), I'd really appreciate it!
ReplyDeleteTo Shini..
ReplyDeleteI did link to F21 The Skinny blogspot.. :) It's there in the end I have source: The Skinny.. If you think it's not obvious enough, I could move it up somewhere..
Oh sorry I missed it! Thought it was part of the meta information at the bottom ;) Sorry about that!
ReplyDeletei love this. saw your work on another blog. glad that it is step-by-step! :)
ReplyDeletei follow you! check out my blog some time.
http://cherylclarke.blogspot.com
You did a great job.
ReplyDeleteAMAZING!!!! I'm pretty sure my attempt won't look as good as this but I'm going to try!
ReplyDeletetheDUSKzone
ooh my God!! You're so very very very creative!! The shoes looks much much better after you put the chain!!
ReplyDeleteVery nice try,really adore your creativity.. ^_^
this is an awesome DIY !
ReplyDeletei got your web from diya's blog :) :)
xoxoxoxo
glistersandblisters.blogspot.com
LOVE THIS!!! where did you buy the studs/spikes??
ReplyDelete